Help and user guide

SnapGrid Window Manager Help
Everything you need to install, set up layouts, snap windows, manage multiple monitors, and get the most out of every setting.
SnapGrid Window Manager — Help & User Guide
1. Overview
SnapGrid Window Manager is a macOS window management app that keeps your desktop organized using flexible grid-based layouts.
Instead of manually dragging window edges to resize apps, you define zones on your screen and snap windows into them with a single drag. SnapGrid Window Manager handles all positioning and resizing automatically.
SnapGrid Window Manager is optimized for:
- Standard displays and Retina screens
- Ultrawide monitors
- Multi-monitor setups
- Fast, distraction-free workflows
2. Installation
Requirements
- macOS 13 Ventura or later
- macOS Accessibility permission (granted once during setup)
Install steps
- Download the SnapGrid Window Manager
.dmgfrom the download page. - Open the disk image and drag SnapGrid.app to your Applications folder.
- Launch SnapGrid Window Manager from Applications or Spotlight.
- macOS will prompt you to grant Accessibility permission — click Open System Settings and enable SnapGrid Window Manager under Privacy & Security > Accessibility.
- SnapGrid Window Manager is now running in your menu bar.
3. Layouts & Dashboards
SnapGrid Window Manager uses layouts (also called dashboards) to define how your screen is divided into snap zones.
Predefined layouts
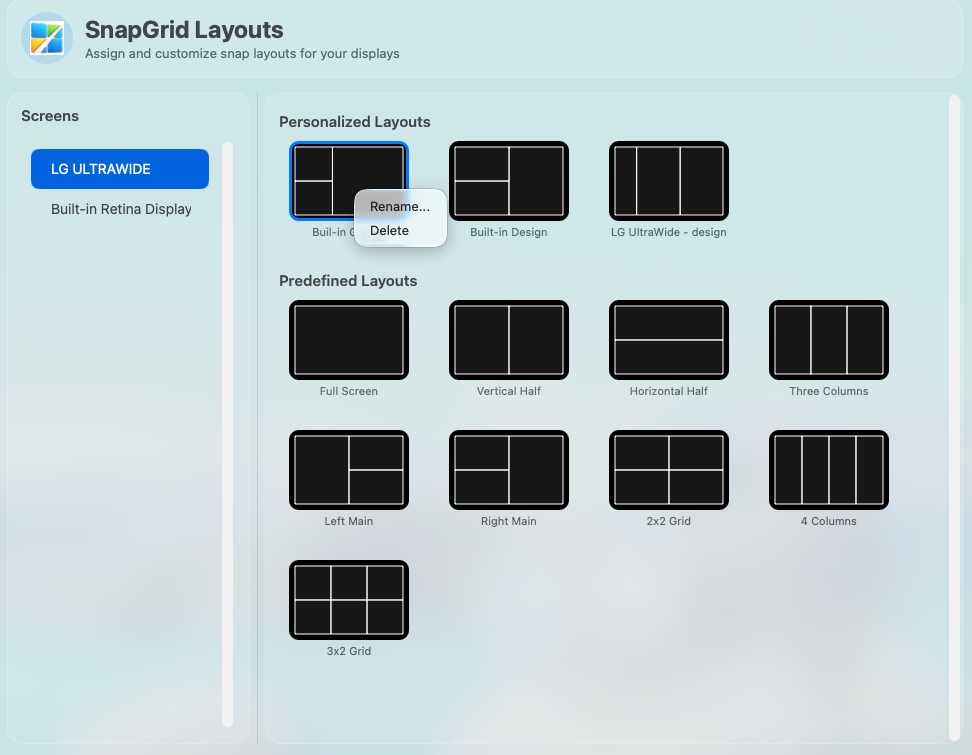
Eight built-in layouts are available immediately:
| Layout | Description |
|---|---|
| Full Screen | One zone covering the entire display |
| Vertical Half | Two equal vertical columns |
| Horizontal Half | Two equal horizontal rows |
| 2×2 Grid | Four equal zones in a 2-column, 2-row grid |
| 3×2 Grid | Six zones in a 3-column, 2-row grid |
| 4 Columns | Four equal vertical columns |
| Left Main | Large left column with a narrower right panel |
| Right Main | Large right column with a narrower left panel |
Personalized layouts
- Create custom layouts in the Layout Editor
- Rename layouts to match your workflow (e.g., “Coding”, “Meetings”, “Research”)
- Delete layouts you no longer use
- Layouts are saved per display so each monitor has its own collection
4. Layout Editor
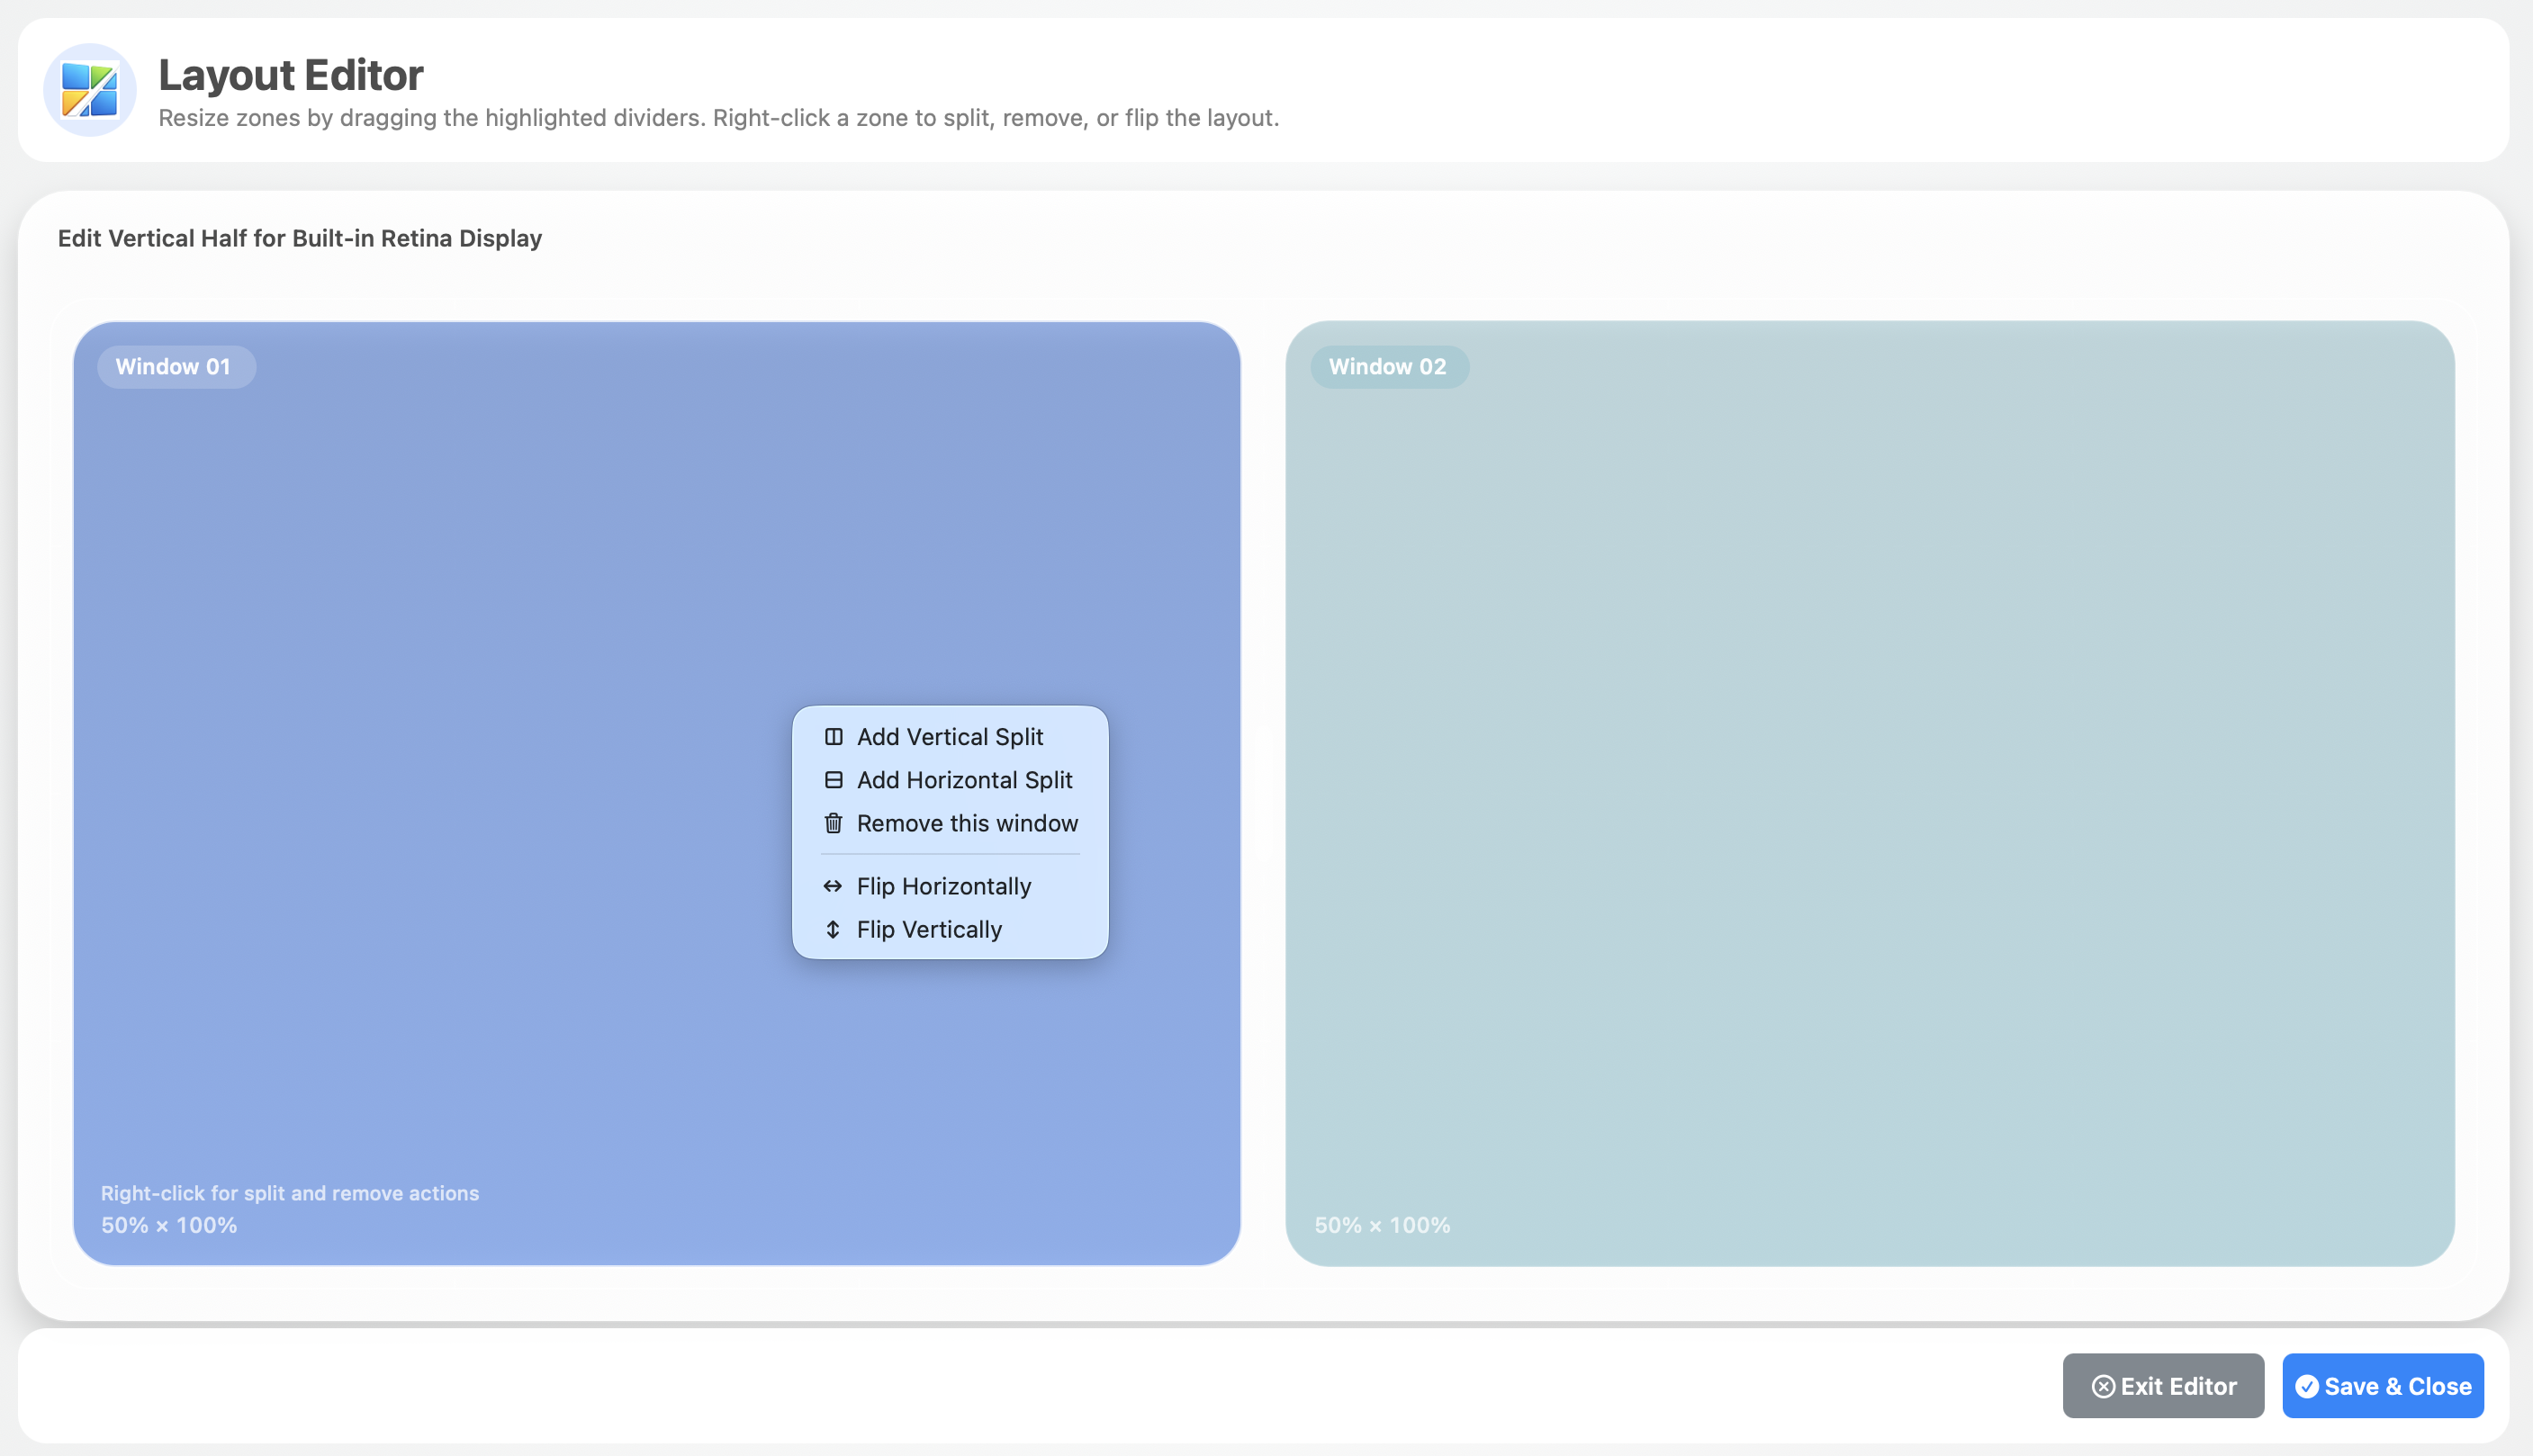
The Layout Editor lets you build advanced custom layouts visually.
Opening the editor
Click the SnapGrid Window Manager menu bar icon and choose Editor…
Building a layout
Split zones
Right-click any zone to see split options:
- Add Vertical Split — divide the zone into two side-by-side sections
- Add Horizontal Split — divide the zone into two stacked sections
Repeat on any zone to create complex multi-column or multi-row structures.
Remove a zone
Right-click a zone and choose Remove to delete it and redistribute the space.
Flip the layout
Use the flip controls to mirror the entire layout:
- Flip Horizontal — swap left and right sides
- Flip Vertical — swap top and bottom
Resize zones
Drag any divider line to adjust the relative size of adjacent zones. Proportions update live as you drag.
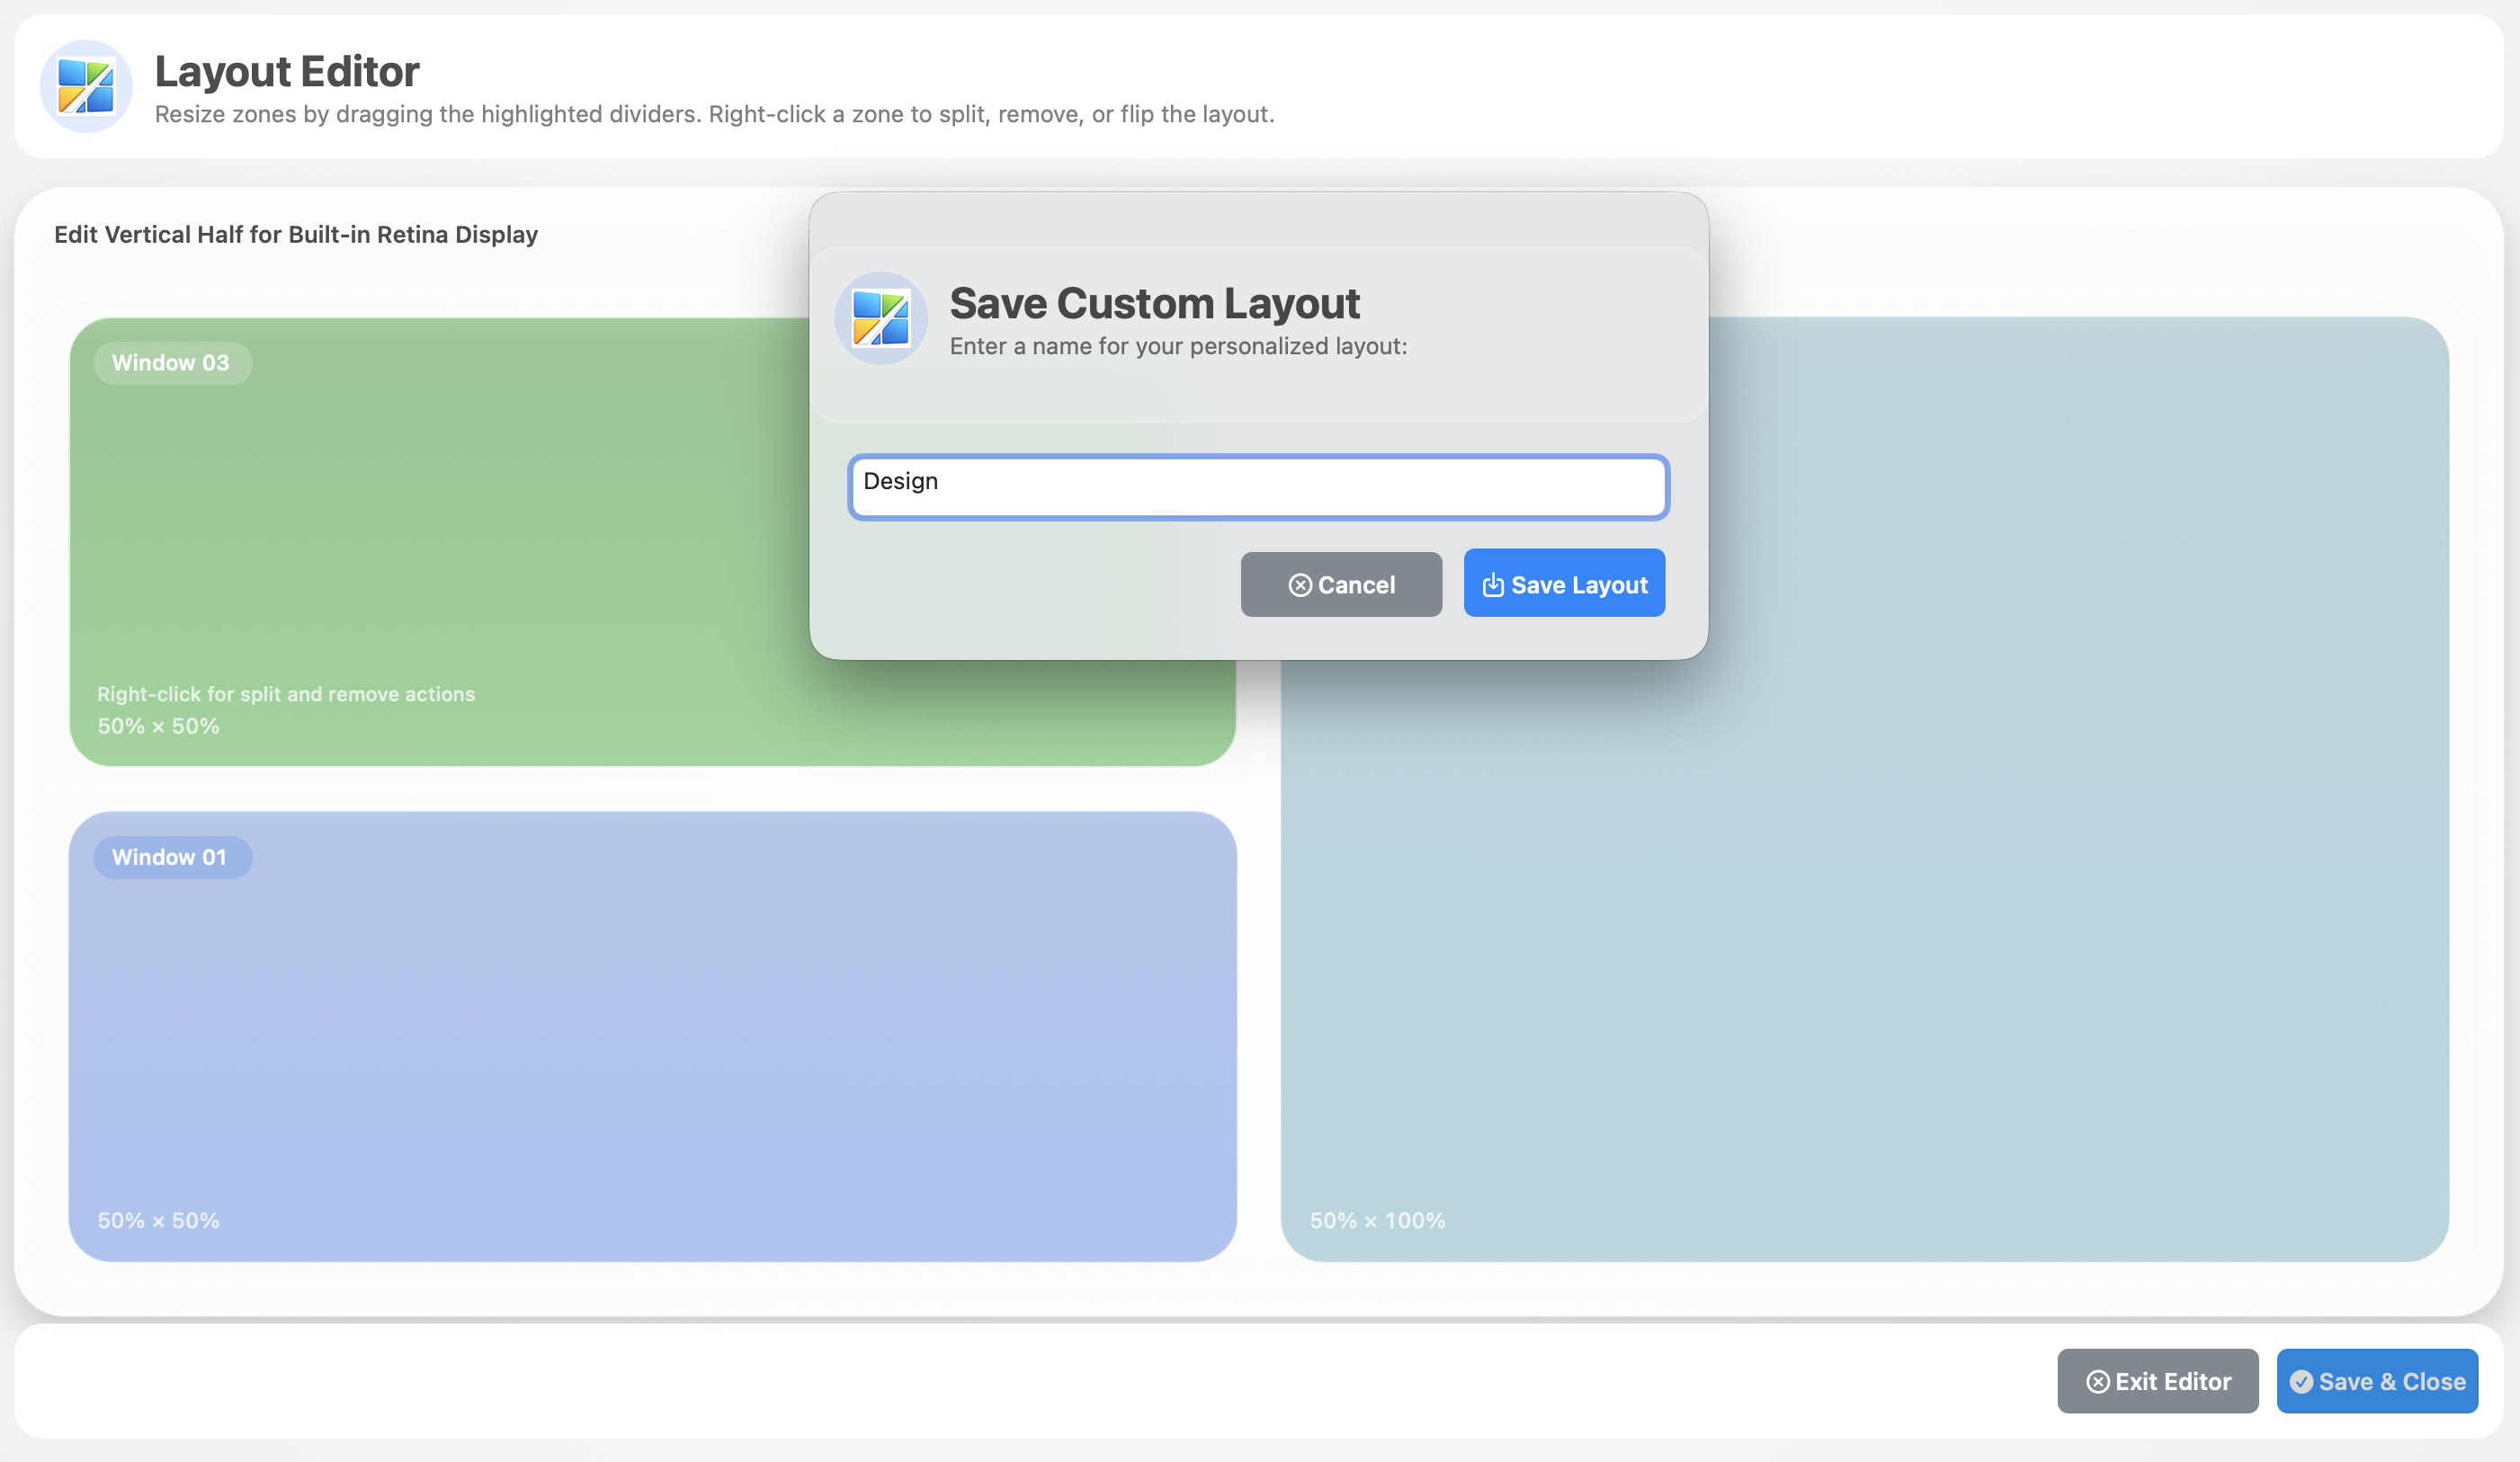
Save the layout
- Click Save Layout in the editor toolbar.
- Enter a name for the layout.
- The layout appears immediately under Personalized Layouts in the menu.
5. Snapping Windows
Once a layout is active on a display, snapping is automatic:
- Click and hold the title bar of any app window.
- Drag it toward a grid zone on your display.
- SnapGrid Window Manager highlights the target zone.
- Release the mouse — SnapGrid Window Manager positions and resizes the window to fill the zone exactly.
Snapping behavior
- Snapping is triggered when you move a window over a defined zone.
- The window is resized to match the zone dimensions according to your Snap area scale setting.
- Snapping works with all standard macOS applications.
6. Multi-Screen Support
SnapGrid Window Manager handles each connected display independently:
- A separate active layout is tracked per monitor.
- Personalized layouts are saved per display — your LG Ultrawide and your Retina laptop screen each remember their own layouts.
- Changing layouts on one screen has no effect on other screens.
To assign a layout to a specific monitor:
- Move the cursor to that monitor.
- Click the SnapGrid Window Manager menu bar icon.
- Choose a layout — it applies to the display where your cursor is.
7. Menu Bar Access
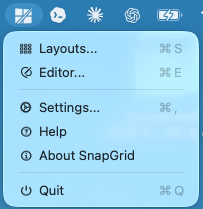
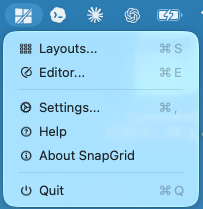
SnapGrid Window Manager runs entirely from the macOS menu bar. The menu provides:
| Option | Action |
|---|---|
| Layouts… | Select a layout for the current display |
| Editor… | Open the visual layout editor |
| Settings… | Configure snapping behavior and app preferences |
| Help | Open this user guide |
| About SnapGrid Window Manager | Version and license information |
| Quit | Exit SnapGrid Window Manager |
8. Settings
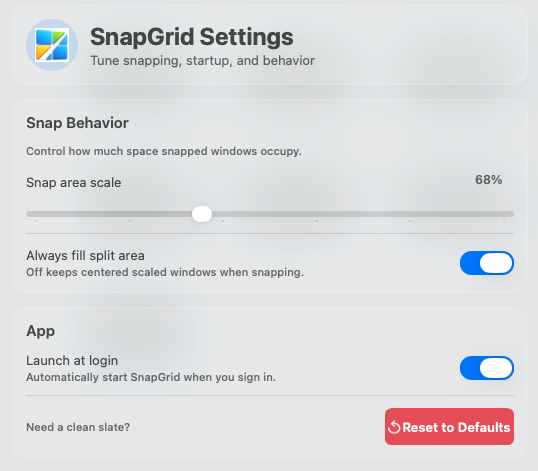
Snap behavior
Snap area scale
Controls how much of a zone a snapped window occupies. Lower values leave uniform margins around windows inside their zones.
- 100% — window fills the entire zone edge to edge
- 80–90% — window has breathing room within the zone
- 68% — visible margins; a clean, padded look
Always fill split area
- On — window always stretches to fill the full zone, regardless of snap scale
- Off — window is centered and scaled within the zone according to the snap scale value
App settings
Launch at login
Starts SnapGrid Window Manager automatically when you log in to macOS. Recommended if you rely on window layouts daily.
Reset to defaults
Restores all settings and layouts to their original factory values. Use this to start fresh if your layout configuration has become inconsistent.
9. Use cases
SnapGrid Window Manager works across a wide range of daily workflows:
| Workflow | Suggested layout |
|---|---|
| Development | Left Main — editor left, terminal + browser stacked right |
| Design | 2×2 Grid — tool top-left, canvas top-right, references bottom |
| Research | 4 Columns — multiple browser windows side by side |
| Writing | Vertical Half — editor left, reference material right |
| Meetings / video | Left Main — meeting window left, notes right |
| Finance / data | 3×2 Grid — multiple spreadsheets and dashboards visible |
10. Troubleshooting
Windows do not snap
- Open System Settings > Privacy & Security > Accessibility.
- Make sure SnapGrid Window Manager is listed and enabled.
- If SnapGrid Window Manager is not listed, relaunch the app — it will re-request permission.
Layout not appearing
- Confirm the correct display is active (move your cursor to that monitor before opening the SnapGrid Window Manager menu).
- Personalized layouts are saved per display — layouts created on one monitor will not appear on a different monitor.
Multi-monitor issues
- If a monitor is not recognized, disconnect and reconnect the display cable.
- Restart SnapGrid Window Manager after reconnecting: click the menu bar icon and choose Quit, then relaunch from Applications.
- If layouts are lost after a display change, use Reset to defaults in Settings and recreate your layouts.
App window can’t be snapped
Some system windows (like the macOS System Settings panels or certain privileged windows) cannot be moved or resized by any third-party app due to macOS security restrictions. This is expected behavior.
11. Tips
- Create dedicated named layouts for each context: “Coding”, “Meetings”, “Research”, “Writing”.
- Use different layouts per monitor so each screen always reflects the work happening on it.
- Set a low snap scale (around 70%) if you prefer visual spacing between windows.
- Enable Launch at login so SnapGrid Window Manager is always available without manual startup.
12. Support
For help and support:
- Use the Help option in the SnapGrid Window Manager menu bar menu.
- Email the SnapGrid Window Manager team at support@hpy-apps.com.